 |
| League Champions. |
Now I'm not a huge fan of pumpkin. I actually very much dislike pumpkin pie. But I do love cheesecake, and if you're like me and don't absolutely adore pumpkin flavored foods, this is a good way to still participate in all the seasonal eating. You know you want to! These mini Oreo Pumpkin Cheesecakes are both cute and only slightly pumpkin-flavored, the perfect Intro to Pumpkin dessert.
The recipe was actually quite simple until the end. It literally took only a few minutes to prepare before baking, and most of the ingredients were things I had on hand. Last week I picked up some Halloween-colored Oreos and a little cream cheese in anticipation of this dessert, and after work yesterday I called home just to check on the status of those items I had purchased. Sure enough, Gramps and his friend had found and eaten half of my stash of Halloween Oreos, and they got into the cream cheese as well, so I made another trip to the store. All out of Halloween Oreos! Luckily I was able to find some store-brand sandwich cookies with orange filling, so I used about half of each.
I made a double batch, because who makes just twelve of anything delicious? When something looks good, always make extra. They will get eaten. Here's what you need for 24 mini-cheesecakes.
Ingredients:
2 packages cream cheese
1 cup sugar
1 teaspoon vanilla
1 (or less) cup canned pumpkin mush
2 eggs
1/2 teaspoon cinnamon
1/4 teaspoon nutmeg
4 tablespoons flour
2 pinches salt
24 Halloween Oreos (or just "sandwich cookies" if your family ate your Oreos)
Chocolate/white chocolate chips
Start out by preparing your cupcake pans. Line them with wrappers and place a single Oreo in each space. I don't know if a spritz of cooking spray would help (as with every cooking question I have, Google says both yes and no), but mine stuck to the wrappers a little at the end. Your call. Preheat the oven to 325º F.
 |
| My lovely assistant. |
The best part of this recipe, in my opinion, is that you only need to dirty one bowl. Just make sure it's a big bowl. Soften your cream cheese and mix your sugar in.
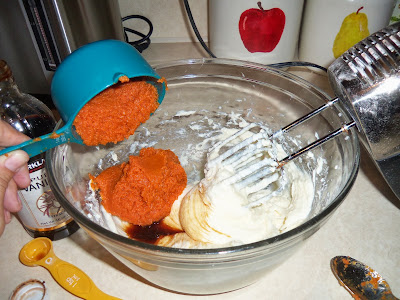
Then add basically the rest of the ingredients! Vanilla, pumpkin, egg, cinnamon, nutmeg, flour, and salt. Mix it all together in your giant bowl. Your cheesecake batter is complete! See? Simple. The other great part about this recipe is that before you bake it, it's not delicious like cookie dough, so you don't eat half of it before you get it into the oven.
 |
| Add ingredients. |
 |
| Mix ingredients. |
 |
| Voila! |
Mine took about 23 minutes to bake, and I put both pans in at once. I didn't have any problem with it this time, but in the past I have ended up with a sheet of burnt cookies up top and doughy ones on the bottom. You may want to play it safe it bake one batch at a time. But again, I don't like waiting, so all into the oven at once!
After they're finished baking, let the cheesecakes cool for a bit and take them out of the pans. You can take them out of the wrappers now if you want, but I found when I took one out, a lot of the cheesecake stuck to the wrapper. This won't happen as much after you chill them. My advice: leave them in the wrappers until they're ready to eat, especially if you have cute wrappers.
Melt about 1/3 cup of chocolate or white chocolate chips in the microwave. Don't burn them! Stir every 10 seconds or so. If you have a bag for piping chocolate, use it. I cut the tip off a Ziploc bag, and boy was it messy until I got the hang of it. Pipe concentric circles onto the cheesecakes, and use a toothpick to spread them out from the middle into spiderwebs. Or what I found to be easier, was just to start in the middle and spiral outward instead.
 |
| Messy with concentric circle strategy. |
 |
| Always post the pictures after people have eaten what you made. Sorry guys. It was messy. |
So instead, I used the white chocolate. I cut the tip of the bag ever so slightly. The smaller the better. You'll get much better line quality with the small tip, and your spider webs will actually resemble webs!
 |
| Smaller opening on the bag, spirals. Much better! |
And the best part? "What? There's an Oreo inside?!" Yeah there is.
Surprise!


Great job Amy--I actually got to eat one and it was very good!
ReplyDelete-Judy Bressler